モジュール 2: 環境をセットアップする
このモジュールでは、Lightningアプリケーション開発を行うための環境を構築します。
なにを学ぶことができるか
- Salesforce組織のLightningコンポーネントの有効化方法
- カスタムコンポーネントのインストール
- 取引先責任者でのカスタム地理位置情報項目の設定
ステップ 1: Lightningコンポーネントを有効化する
設定画面より 開発 > Lightning コンポーネント をクリックします。
Lightning コンポーネントを有効化 のチェックボックスを有効にします
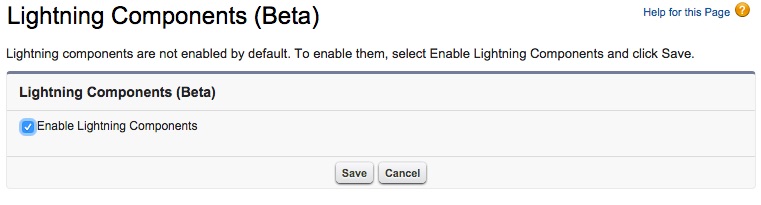
Save をクリックします。
ステップ 2: カスタムコンポーネントパッケージのインストール
- http://bit.ly/InstallComponent のURLをブラウザのアドレスバーにコピー & ペーストします。
- パッケージインストールの詳細画面で 次へ を選択します。
- パッケージのAPIアクセスの承認画面で 次へ を選択し許可します。
- セキュリティレベルの選択画面で 全てのユーザへのアクセス権の付与 を選択します。
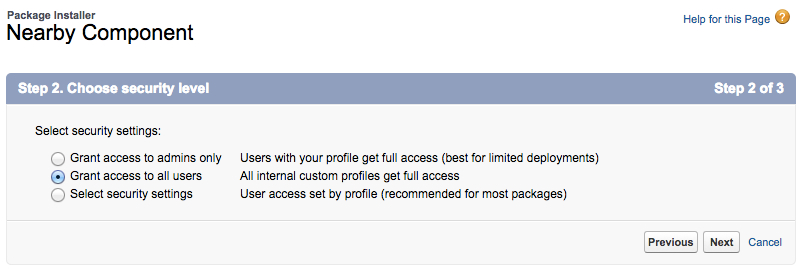
- 次へ を選択します。
- インストール を選択します。
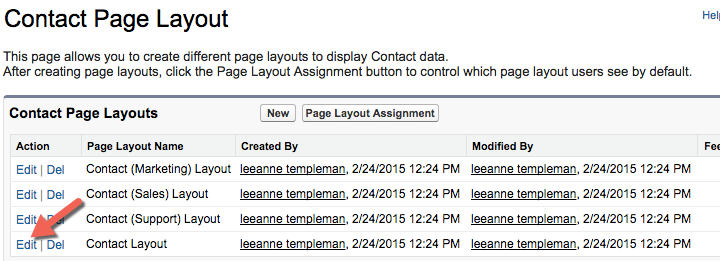
ステップ 3: 取引先責任者のページレイアウトにカスタムフィールドを追加する。
- 設定 | ビルド | カスタマイズ | 取引先責任者 | ページレイアウト を選択します
- 最後の行のContact Layoutの横の編集 を選択します
- Location フィールドを上部の有効フィールドトレイからドラッグし、住所情報のセクションにドロップします。
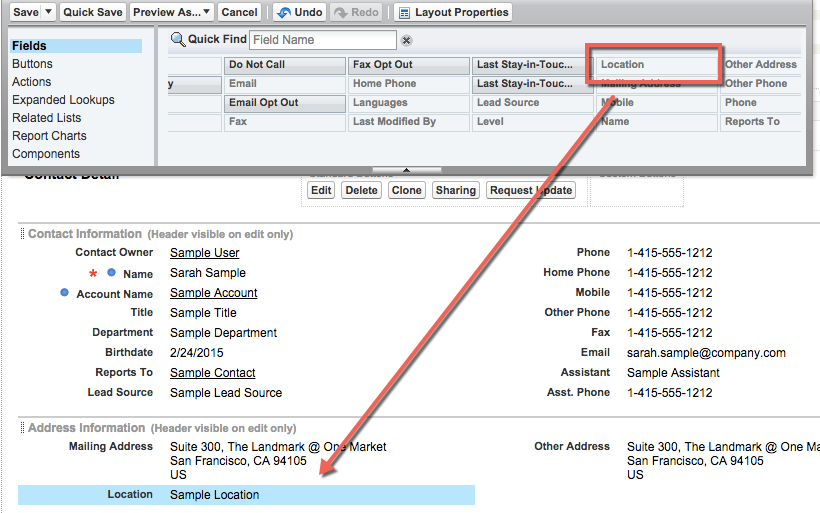
- 保存 をクリックします。
ステップ 4: サンプルの取引先責任者を地理位置情報付きで作成する。
Salesforce組織の中に新しい取引先責任者を作成し、インストールされた地理位置情報フィールドに情報を入力します。これが最終的に取引先責任者の位置情報から地図を表示するコンポーネントで利用されます。
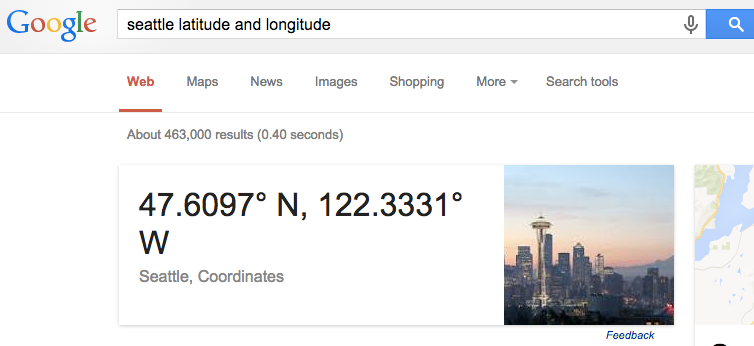
- First, open a new tab to www.google.com and look up the Latitude and Longitude of the city you are currently in. Most major cities will automatically show the coordinates in the front page of your google search.
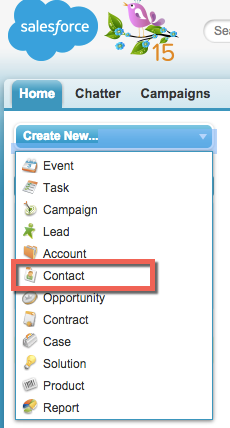
- In your Salesforce tab, navigate to the Home tab.
- In the left navigation of your salesforce home screen, select the drop down for Create New Contact
- Make up any contact name you would like, and scroll down the page to the address area, where you will see the Latitude and Longitude fields. Enter the Latitude and Longitute numbers from your google search into the fields on the new contact, omitting the N and W. The Latitude will be the first resulting number in your google search, and the longitude the second number.
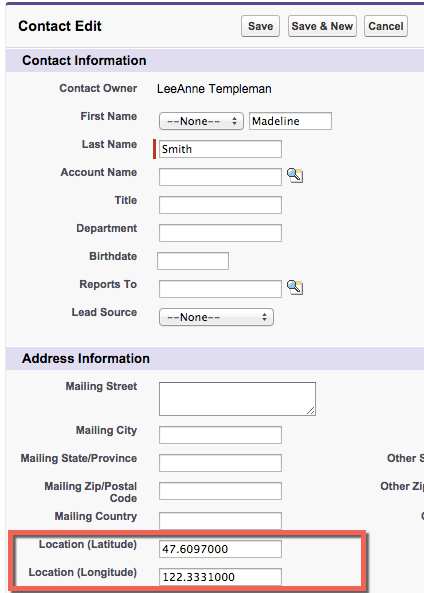
- Click Save
- Create 2 more contacts with locations near your main city.
- Extra Credit Look up the coordinates for a city 500-1500 miles away from your current location, create some contacts with coordinates in those other locations as well.